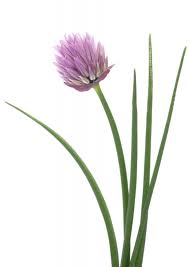
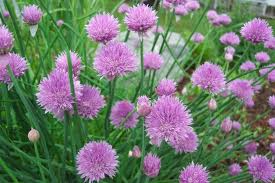
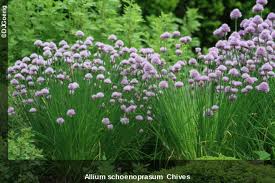
 Chives, Allium schoenoprasum, are a member of the onion family (Alliaceae). Although they are native to Asia and Eastern Europe, by the sixteenth century chives were common plants in herb gardens throughout Europe.
Its grass-like hollow leaves have a mild onion flavor and are widely used fresh in salads and dips. The small puffs of flowers generally begin to bloom in late May or June. These are edible, and can be used in salads as well as in flower arrangements.
While most common chive varieties have pink blossoms, the cultivar ‘Forescate’ has rose red flowers. 'Corsica' and 'albiflorum' have white flowers.
Note - Garlic chives and Chinese chives both have garlic flavor, and belong to a different species, Allium tuberosum. They grow taller (up to 2 feet) than common garden chives, and have white flowers.
Planting Chives
Chives thrive in full sun and well drained soil rich in organic matter with a pH of 6.0-7.0 (zones 3 to 9) While they tolerate light shade, 6-8 hours of direct light is best.
The easiest and most successful means of propagating chives is planting rooted clumps in spring, after frost danger has passed. Established plants usually need to be divided every 3-4 years and division is best done in spring.
Space plant clumps 6-12 inches apart. Replant new clumps in soil enriched with organic matter, such as fine compost. Another approach is to just spread the clumps around the landscape in the flower beds, shrub beds, and like that.
Mulches - Organic mulches help conserve water, supply extra nutrients, and reduce weeding so it is important to have 2 to 3 inches of mulch around each clump.
Chives can also be started from seed. Chive seed germinate easily, but slowly. Sow seed about 1/2 inch deep in flats containing a peat-based soilless mix. Maintain constant moisture and a soil temperature of 60 to 70 F. It takes 7 to 21 days for germination. In four to six weeks, the young plants can be planted outdoors, preferably after all danger of frost is past. Chives can also be direct seeded outside when the soil is warm, but then few if any leaves should be harvested that first year. Chives seed can be saved for up to three years.
Caring For Chives
Watering - When rain is infrequent, water deeply to make sure the soil does not dry out around the root zone. A light mulch of ground-up leaves, compost, or grass clippings will help retain moisture.
Fertilizing - Over-fertilizing can be detrimental to chives. Like many herbs, slower, more compact growth leads to stronger flavors and healthier plants. A soil rich in organic matter should provide sufficient nutrients.
However, if the plant begins to weaken from continuous harvesting each year, a very light application of a general purpose granular organic fertilizer may be needed once each spring to boost the plant's vigor. Use a liquid fertilizer at one half the label-recommended strength every 4-6 weeks for chive plants grown outdoors in containers or indoors in a sunny window.
Grow Indoors - Chives can be grown easily indoors in a bright, sunny location. Pots must have holes in the bottom for drainage, and soil should be well drained, not heavy. Use a good houseplant potting mix. During winter, when light is poor, the plant will not grow much, and may even die back a bit, but should rally with the return of brighter sun in spring. Do not fertilize during winter.
 Harvesting - Leaves can be harvested after established plants are 6 inches tall. To harvest, simply cut the leaves 2 inches above the ground. Usually in home gardens all the leaves of a clump of plants are not cut off at one time. This allows that same clump of plants to be cut over and over again throughout the growing season.
Cut flower stalks off at the soil line as soon as they appear. This will prevent the plant from forming seed and keep it more productive. The blossoms are edible and make a wonderful addition to a salad.
Cooking -
Kuchenprofi No-Mess Herb Grinding Mill
by Kuchenprofi
• The effortless way to chop fresh herbs; pop leaves and sprigs into the hopper, turn the crank and internal blades do the chopping
• Screw-off jar
• No exposed blades; no nicked fingers; no tired wrists
• 18/10 stainless steel hopper and lid; 6-3/4 inches high by 3-3/4 inch diameter
• Dishwasher safe
Chop fresh herbs without a knife! Simply pop leaves and sprigs into the hopper of the Kuchenprofi Herb Grinding Mill, turn the crank and internal blades do all the chopping for you, depositing evenly minced results into the screw-off jar below. No sharp blades, nicked fingers or tired wrists! Dishwasher safe 6-3/4-inch high by 3-3/4-inch diameter.
Chives are most flavorful when used fresh and are a common addition to baked potatoes, cream soups, and egg dishes. There is some evidence that chives can improve digestion and reduce high blood pressure. The oil has antibacterial properties.
Extra chives can be frozen by chopping up prewashed leaves into small pieces and freezing them in plastic containers. It is not necessary to thaw pieces out before using.
Month to Month Care Tips
 Month of March - Chives – If you have a neighbor with some chives, ask for a clump when spring arrives. If you already have chives, they should be divided into smaller clumps every three years or so.
Month of April Chives – Best to buy some seedlings from the garden center or get a clump or two from a friend; seeds are hard. Place the seedlings or clumps about 8 inches apart. Chives need no fertilizer.
The leaves of chives can be snipped any time after established plants are 6 inches tall. In harvesting, cut several blades low to the ground (leave 2 inches), rather than shear a little bit off the tops of a lot of blades.
Month of May Chives – The flowers of chives are edible and make a nice addition to a salad or simply to dress up a plate.
Optional – Chives like to be mulched with 2 to 3 inches of organic mulch.
Month of June
Optional – Some people cut their chives back to the ground about three times each summer. This forces them to send up a whole bunch of replacement shoots.
Month of July
Month of August - Chives – Chives can be brought indoors for fresh harvests all winter long. Dig up a clump in late summer and plant them in a pot. Leave the container outside for several months to insure that the tops die back and roots freeze; they need this cold dormant period. In November or December, bring the pot indoors and place it on a sunny windowsill. Plants will sprout within a few weeks, and you’ll soon be enjoying freshly snipped chives again.
Month of September
Month of October - Chives – Chives will die back a few weeks after the first hard frost has arrived. Sometime before next spring, cut off the dead leaves down to about an inch. The new shoots will appear in March or April.
Month of November
Month of December
Problems of Chives
Symptom Probable Cause
Soft, brown tissue at neck Botrytis Rot
Young plant falls over at soil line and dies Damping Off, A Fungal Disease
Tops wilted, stunted; growth slows, roots turn pink; leaves yellow or whiten, die Pink Root
Pale green, yellow spots on leaves, fuzzy purple cover spots Downy Mildew, A Fungal Disease
Leaf tips wilt, bulb is soft and brown inside Fusarium Basil Rot

